Thursday, 9 December 2010

What i have learnt

there have been many different things i have learnt this semester that have vastly improved my skills within 3ds max, some have helped to increase render times and others to reduce :P

a lot of the new things have been hard to grasp but once i understood them fully they have helped to improve my animations, and help other group memebers with problems they have been having.


new modifiers i have learnt:


FFD - enables you to deform an object for animation.

bend - enables you to bend an object along different axis and angles to a required amount.

attribute holder - enables you to add variables to an object which you can use to vary animation

pathdeform (WSM) - enables you to deform an object along a path/spline


modeling techniques:

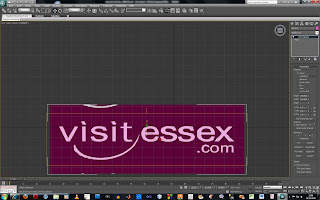
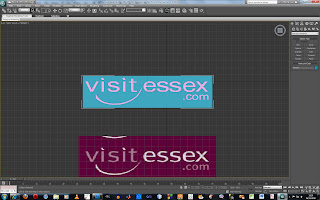
spline modeling - i used this for to animate object, cameras, lights. and for creating the visit essex logo.

helpers - i used these extensively for the car rig. they also come in helpful when animating to allow u to target cameras to and be able to quickly unlink if its not what u wanted.

PArray - not so much modeling but automates the creation of objects to reduce custom modeling amount.

IK Solvers - used to reduce the amount of movement on an object when slight movements have large effects.

photometric light - these lights enabled our group to produce the very realistic shadows on the scene to create our cartoon/realistic effect. they are very complicated to configure to get the required effect but they give the effect we were after.


Animation:

i learnt many new animation effect and techniques that reduced the amount of time it took to create my animations.

Constraints - i used many different types of constraints. LookAt, orientation, position and path.
the title of each gives away what they are used for and enable the animator to focus on the small details by automating the rest of the in-between stuff.

Link tool - through the car rig tutorial i learnt the importance of using the link tool. if i need to move 2 objects in the same direction or rotation, before i would animate them independently this would take a while for one and would produce jerky results using the link tool moves the linked item for you and follows the other object perfectly, reducing the amount of time to animate and the smoothness of the animation.
it creates a hierarchy where different objects have reliance on others.

align tool - i used the align tool extensively to get objects to animate to the correct position in relation to other objects.


Other:

network rendering - this saved me and a lot of other people vast amounts of time, it enabled us to render whole animations in a matter of hours rather than days. so we could test animations and redo sections that otherwise would have been left due to time constraints. and the main thing was that it was soooooo easy to set up.

i used premier pro and sonar to edit the final videos and sound track. i used a number of transition effects to get the video to flow well. fade effects on the audio to reduce the time of the sound file to the desired length.


monster truck animation

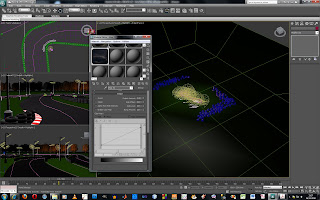
as the truck is on a mud/dust part of the arena i thought it would add a level of realism to the animation i would have a dust trail coming from the tires. unfortuantly i dont have any screen shots of this process but i have some of the final product.

i started by creating a plane that was slightly longer thant he width of the outer side of the 2 tires on each axel, it hen aligned it to the middle of the tires and moved it backwards until it was in the correct place for where the dust would start to emulate. lastly i rotated the plane to enable the particles to travel upwards slightly.


i then linked each plane (front & rear) to their respective wheels via one of the wheel hubs.

i then created a PArray to control the creation, growth and speed of the emitted particals.
i havnt started them imediatly as the truck doesnt start moving straight away, but i started it as the body tilts up to create an effect of the truck doing a wheelspin. i also set the life of the particles to 25 so just short of a second. lastly the particles stop emiting as the truck gets on to the straight.

as the terrain isnt too dusty, more muddy i put the size of the particles small.

the last stage was to add a material to the particles, i tried to get a dark brown colour to match the ground so it looked more like mud than dust, but due to the gradient and noise mask to produce the transparent areas it still looked a lot like dust.

Final Product.

Wednesday, 8 December 2010

finishing touches to the monster truck scene

once i added lights i had major issues with the scene being very dark and no matter how much i changed the intensity it stayed dark. i fixed this by createing a new file and importing the models. one of the texutres failed to be imported. and i needed to change another but it wasnt in the material editor.
i opened up the original file and the material editor. i then selected the materials i needed in turn and clicked put to library. and gave it a meaningfull name. i then opened the new file and material editor, clicked Get material. in the dialogue window that opens i select the mtl library, radio button, in this window loads the materials i saved before. i then imported each one by one and reapplied the materials.
i have used photometric lights to give a slightly more realistic feel and i think the lights give the animation a bit more depth.
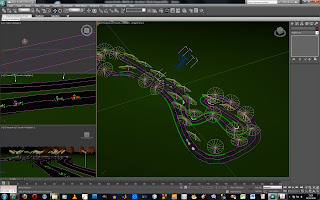
i creted target lights and created a path using a spline for the target to point at. the lights then are coloured. as it drastically increased rendering times, i took off casting shadows.

i created 2 more target photometric lights for the headlights and added a 2% volume light to create a dusty athmosphere at the cars level. i aligned the lights to the headlight recesses, and used the link tool to get them to stay in possition when the body rolls, pivots and moves.
as the car goes up the crushed car to white out the camera the lights rotate up as they arnt high enough. in the animation you dont notice this as it happens as the car moves upwards quickly.
i noticed the arena essex scene doesnt have any way of identifying where it is so i created a billboard for on the wall.
i created a box scaled the sections out to the edge. and then extruded the edges up to create a frame.

i went into the polygon subobject mode, selected the poly shown. and applied the arena essex raceway logo, i had to apply the uvw map modifier to position it correctly.
i then copied this and possitioned the board around the edge of the wall.

animation monster truck scene

now i have the main bulk of the animation done i have added some more minor details to it.
it will only feature n the animation for a fraction of a second but as the truck is using the car to tilt up to white out the camera, i will crush the car to create a ramp for it to happen.

on the car i copied to to i added a FFD modifier. this allows free deformation of the objects using verticies. i used the custom vertion of the modifyer so i could add a custom amount of vertical and horizontal lines. this will allow me to deform the car around the wheels as they hit it.

initially i had lots of problems getting the key frame to set properly it wudnt start the crushing at the set frame it would do it from the beginning of the entire animation. once this was sorted it was easy to start deforming the car. i went to the frame where the car first hits the car and moved the verticies around the tire to make it see the tires crushed the car.
differnt angle to see the deformation
i then went to the next frame and moved the verticies again. i spent some time tweeking the verticies to have influence on the surrounding ones as it would for metal.
the last frame i constructed the ramp that the car will go up. i moved the front wheel handles up and this affected the suspention and therefore the body also.

Friday, 3 December 2010

outro creation

i started by assigning a picture to a plane so i could trace the letters to get them in the correct font. this turned out to be a very ineffective way of doing it and i ended up using the text editior and moving the vertexs to get the correct shape.
this was the created set of shaped planes
i selected the edges and extruded them backwards to create the 3d lettering and back ground. i did this to enable me to cast shadows, once the light is applied.
this is the final render with lights to illuminate the scene and 1 to cast shadows. i think having the 2 planes at right angles to each other with the shadows give a very atmospheric feel.
it was decided as a group that it needed a little extra to finish the animation off. so i added a kart and rig from my go kart scene and have them drifting across the screen to finish the video off.

Wednesday, 1 December 2010

track pt 5


i then added a environment map of the sky. it was a little dark so i copied it into a black space in the material editor and reduced the output amount and this made the image alot darker and more like a night time sky.


i copied the flood light around the whole track and rotated them to point in the correct location. i copied them as an instance so that if need be i could turn all the lights off by just switching the main one off. and if i made any changes i only ahd to do it to one and all the rest would be effected.

Beginning of Animation + track pt 4


now i have the karts rigged. i can start the animation i have 2 groups of karts at 2 sections of the track i will need to reposition the smaller group depending on how long the animation is and where the camera needs to be at certain times.


i couldnt get the sky to look right so i decided to go for a night scene and use flood lights on the track.
i therfore had to model a flood light.
this was simple i used another cylinder and inset the cap and extruded out.


At the top i rotatated the polys to for a curved neck adn then beveled it to create the reflector cone.


i then added a photometric light to the cone to light the track

i very much liked the effect and feel it gives to the scene and will bring it up with my group to light their scenes with the same lights.

i also added a very slight volume to the light to give a night misty feel.

in the background where the camera coudl see the edge of the floor plane i added trees to break up the horizon.